I haven’t felt much like blogging lately, at least not in the way that would let me compose a thoughtful or thought-provoking post. I’ll get it back in time, I’m sure. However, I was just inspired by a post over at IKEAFans about putting in a corner sink.
A corner sink is a bad idea. I’m speaking with the voice of experience. In our last house, the kitchen sink was in the corner. Seems like a good way to put an otherwise unused space to work, right? Well, there’s a geometry issue. In the small kitchen, using normal depth cabinets and counters, the corner sink doesn’t put this space to work, it just makes it harder to reach. When I wanted to clean the counter and wall behind this sink, I had to clear everything off the entire counter because I had to lie down on it and snake my way under the cabinets to reach. Inconvenient barely scratches the surface when describing this. In addition, in order for the door on the cabinet over the sink to be reachable, it had to be a deep cabinet. Again, geometry became an enemy, because the door to this deep, wide cabinet was about five inches wide.
This house, for all its flaws, is nowhere near as bad as that one, but the previous owners did a lot of work to make it pretty, and that’s where the problem lies. They moved and don’t have to deal with living with this stuff, but some of you might be considering remodeling or fixing up, and I feel compelled to tell you that it’s not all about pretty. So here are some things to consider that might make your life easier.
1. Don’t create a space you can’t reach to clean.
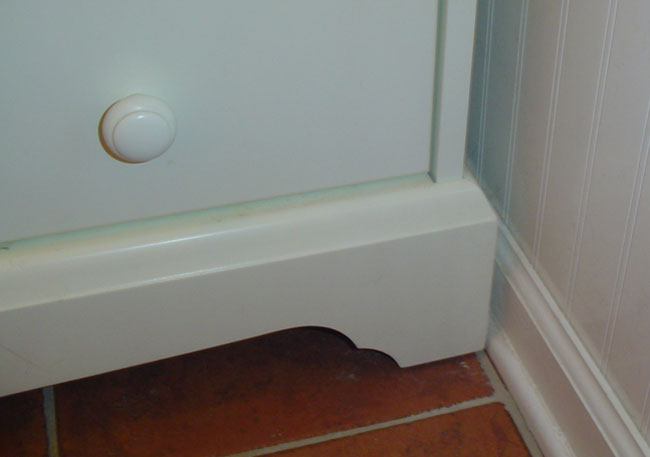
This vanity in the hall bathroom is a major pain. You can see the stuff sticking to the wall, and you can see the fur and dirt and crumbs and such underneath, but there’s only so much of it you can clean. The first few inches of the wall can be wiped down, but you can’t really get into the grooves – and you know that there’s more icky stuff farther back. Unless you want to get out the tools and remove the whole thing, you just have to hope nothing ever spills back there that could get smelly. Underneath, you can take a stick wrapped with a rag and get the big stuff out, but there’s no way to wash that floor.
2. Skipping steps won’t save time in the long run.
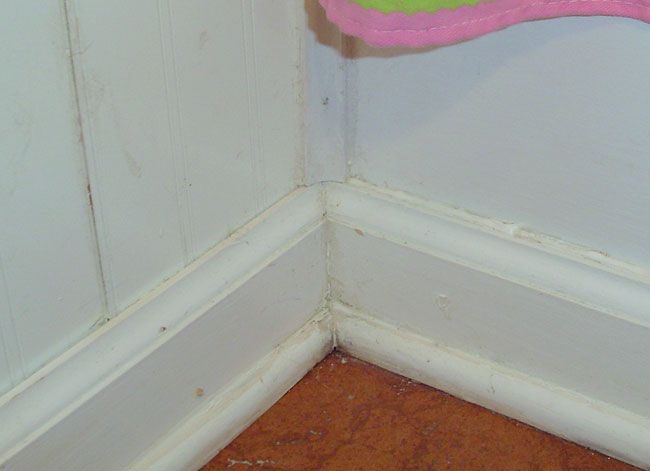
Hey, the woodwork’s white, and so’s the caulk, so there’s no need to paint the caulk, right? Wrong. No amount of scrubbing will clean this stuff. It’s sticky, because it’s supposed to be waterproof and applied to surfaces like showers. It’s the wrong kind of caulk, and even the right kind should have been painted so that there’s a single finish that can be cleaned with the same method. It might have saved a trip to Lowe’s for a different caulk, and saved some painting time, but the time wasted trying to clean this more than makes up for it. There were plenty of other shortcuts taken around here, too. No quarter rounds at the base of the cabinets, so there’s a crumb-catching space between them and the floor. Bare wall where cutting tile was too hard to do. Composite wood surfaces with exposed cut edges. Problem is not only cleaning, but some of these things will also be damaged by exposure to water and cleaning agents. When they go, we’ll replace them with things of our own choosing, but we’ll finish what we start so it doesn’t get ruined.
3. Yes, it does look like you did it yourself.
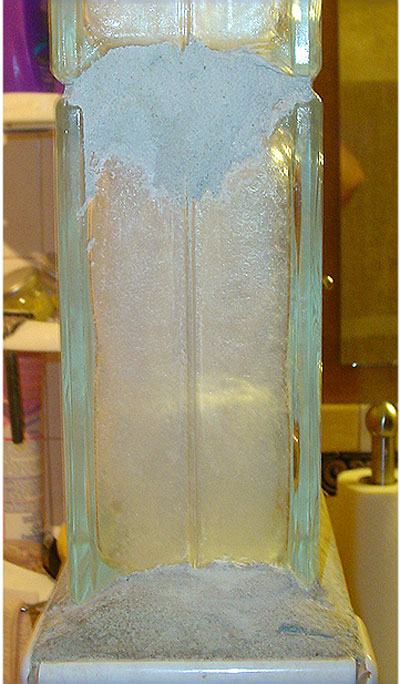
Glass blocks. Concrete. What a clever idea for enclosing the shower! Except when you don’t know how to do it, leave an ugly raw edge, and slop the concrete all over, making a cracked, lumpy, rough surface that hangs onto dust and harbors mold and mildew in every nook and cranny. Think it all the way through, and if it’s beyond your abilities, hire someone or do something different.
4. Sometimes it looks good only in the magazines.
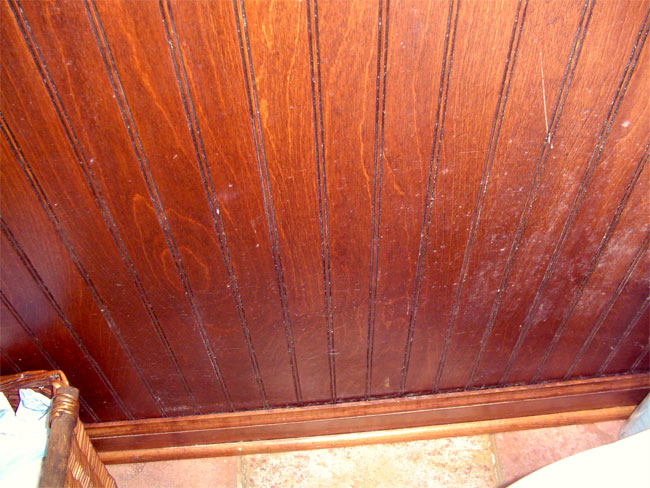
Wainscoting, chair rails, decorative mouldings, all those fancy things you can put on your walls, are for people who have cleaning services. In this case, the wainscoting was stained by the owners, and may have had one brief swipe of varnish applied. In addition, the baseboard and top mouldings were nailed in at either end, and once or twice in the middle. The result? A rough surface that attracts dirt and dust and shreds paper towels, sponges, and rags, so it looks dirtier after you clean it. The gaps fill with debris, but aren’t big enough to clean out (see #1). Even if this had been done right, it just creates more surface area to clean.
5. You still have to install it right, even if it’s preassembled or ready to use right out of the box.
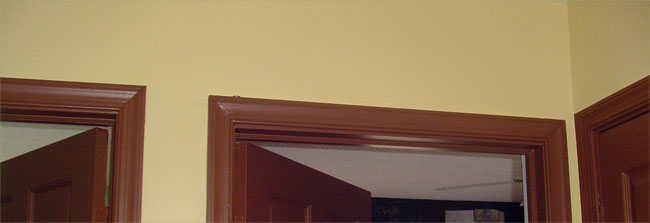
All new doors. They come in a nice kit, all pre-hung. When everything was white, we didn’t notice, but now that the walls and trim are different colors. . .I suppose they just cut the bottoms off most of the doors to fit the openings, or hung them to sit flush with the various carpets rather than install them all at the same height.
6. Consider how, and how much, something will be used.
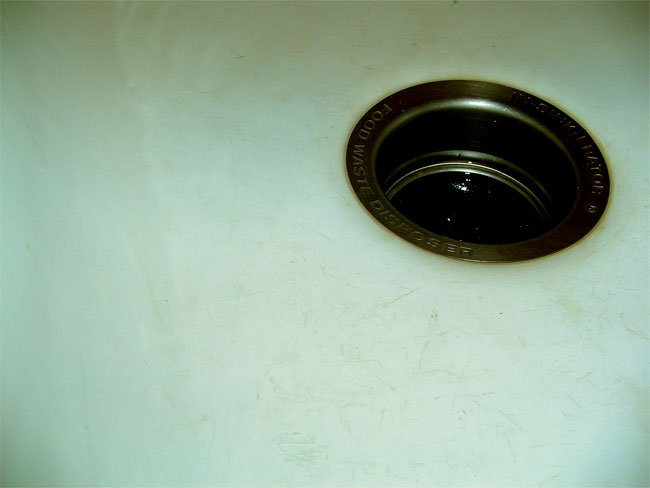
Everything in the kitchen was new, and our sellers were so proud of it. I don’t know if it was their first porcelain sink or not, but I know how horrible these things are. As difficult as it is to clean stainless, it’s a piece of cake compared to porcelain. Everything that goes into it scratches it. Every scratch gets stuff in it. In no time at all, you have something that looks more like a slop sink than a kitchen sink. With stainless, you can spray and wipe and save the serious cleaning for once a week. Porcelain looks like a mess all the time. Even after it’s been cleaned with a nonscratch cleaner and had all the crevices worked at with a toothbrush, the very first dish that goes in makes it look like you’ve never washed it at all.
7. Just because it seems like a good idea doesn’t mean it is.

This is one of those faucets that pull out so you can spray wherever you want, and that switch from aerate to spray with a hidden toggle. Sounds convenient, right? Well, you can’t turn the spray on and off, and you sometimes need two hands to get that hose back into the faucet. Water gets everywhere. And note the ragged rubber over the toggle. The toggle gets used a lot, not only because you sometimes want aerated water and sometimes want a spray, but also because it gets stuck between the two and you have to press really hard to get the one you want. Also note the lovely decorative ridges all over that have to be cleaned with a toothbrush and special cleanser.
So, these are the annoying things I was cleaning today that take a great deal of effort to get mostly but not quite completely clean. Learn from my story, friends, and think about how things will clean up and hold up before you buy it because it looks good. Unless you can hire a cleaning service.
Oh, and here’s another lesson from the voice of experience: put the rubber gloves on before you start with the water and sprays and cleansers. Ow. Now if only I could remember that myself. . .